

The Ultimate Drone IMU Calibration Guide: Master Your Flight Precision in 2026
Last Tuesday, a professional pilot named Mark watched in horror as his $5,000 enterprise drone began drifting toward a concrete pylon despite his controller sticks being centered 🚨. It’s a terrifying moment that 68% of pilots face at least once during a high-stakes mission. If you're tired of fighting "IMU Error" messages or feeling like your aircraft has a mind of its own, you need a definitive drone IMU calibration guide to regain control. Secure your investment and fly with the confidence you deserve today!
We understand how frustrating it is when technical jargon like "accelerometer" or "gyroscope" stands between you and a perfect flight. It's stressful to launch when you don't fully trust your sensors. This guide will show you exactly how to calibrate your drone’s IMU to eliminate drifting, fix those persistent error messages, and ensure professional-grade flight stability every time you take off. We’ll walk through the specific step-by-step process for 2026 hardware and help you determine if your unit needs a simple software recalibration or a professional repair from our expert team. Let's get your bird back in the air with total precision! 🔥
Key Takeaways
- Master the role of the IMU as your drone's "inner ear" to ensure rock-solid flight stability and professional-grade precision.
- Learn the secrets of "Sensor Fusion" to quickly distinguish between simple IMU errors and complex magnetic compass interference.
- Follow our expert drone IMU calibration guide to eliminate drifting and clear frustrating error messages for a flawless flight experience.
- Discover why a "cold" drone is the secret to success and how to set up the perfect interference-free environment for a guaranteed calibration.
- Identify the "Point of No Return" by diagnosing whether your flight issues stem from software glitches or hidden physical hardware damage.
What is a Drone IMU and Why Does it Need Calibration?
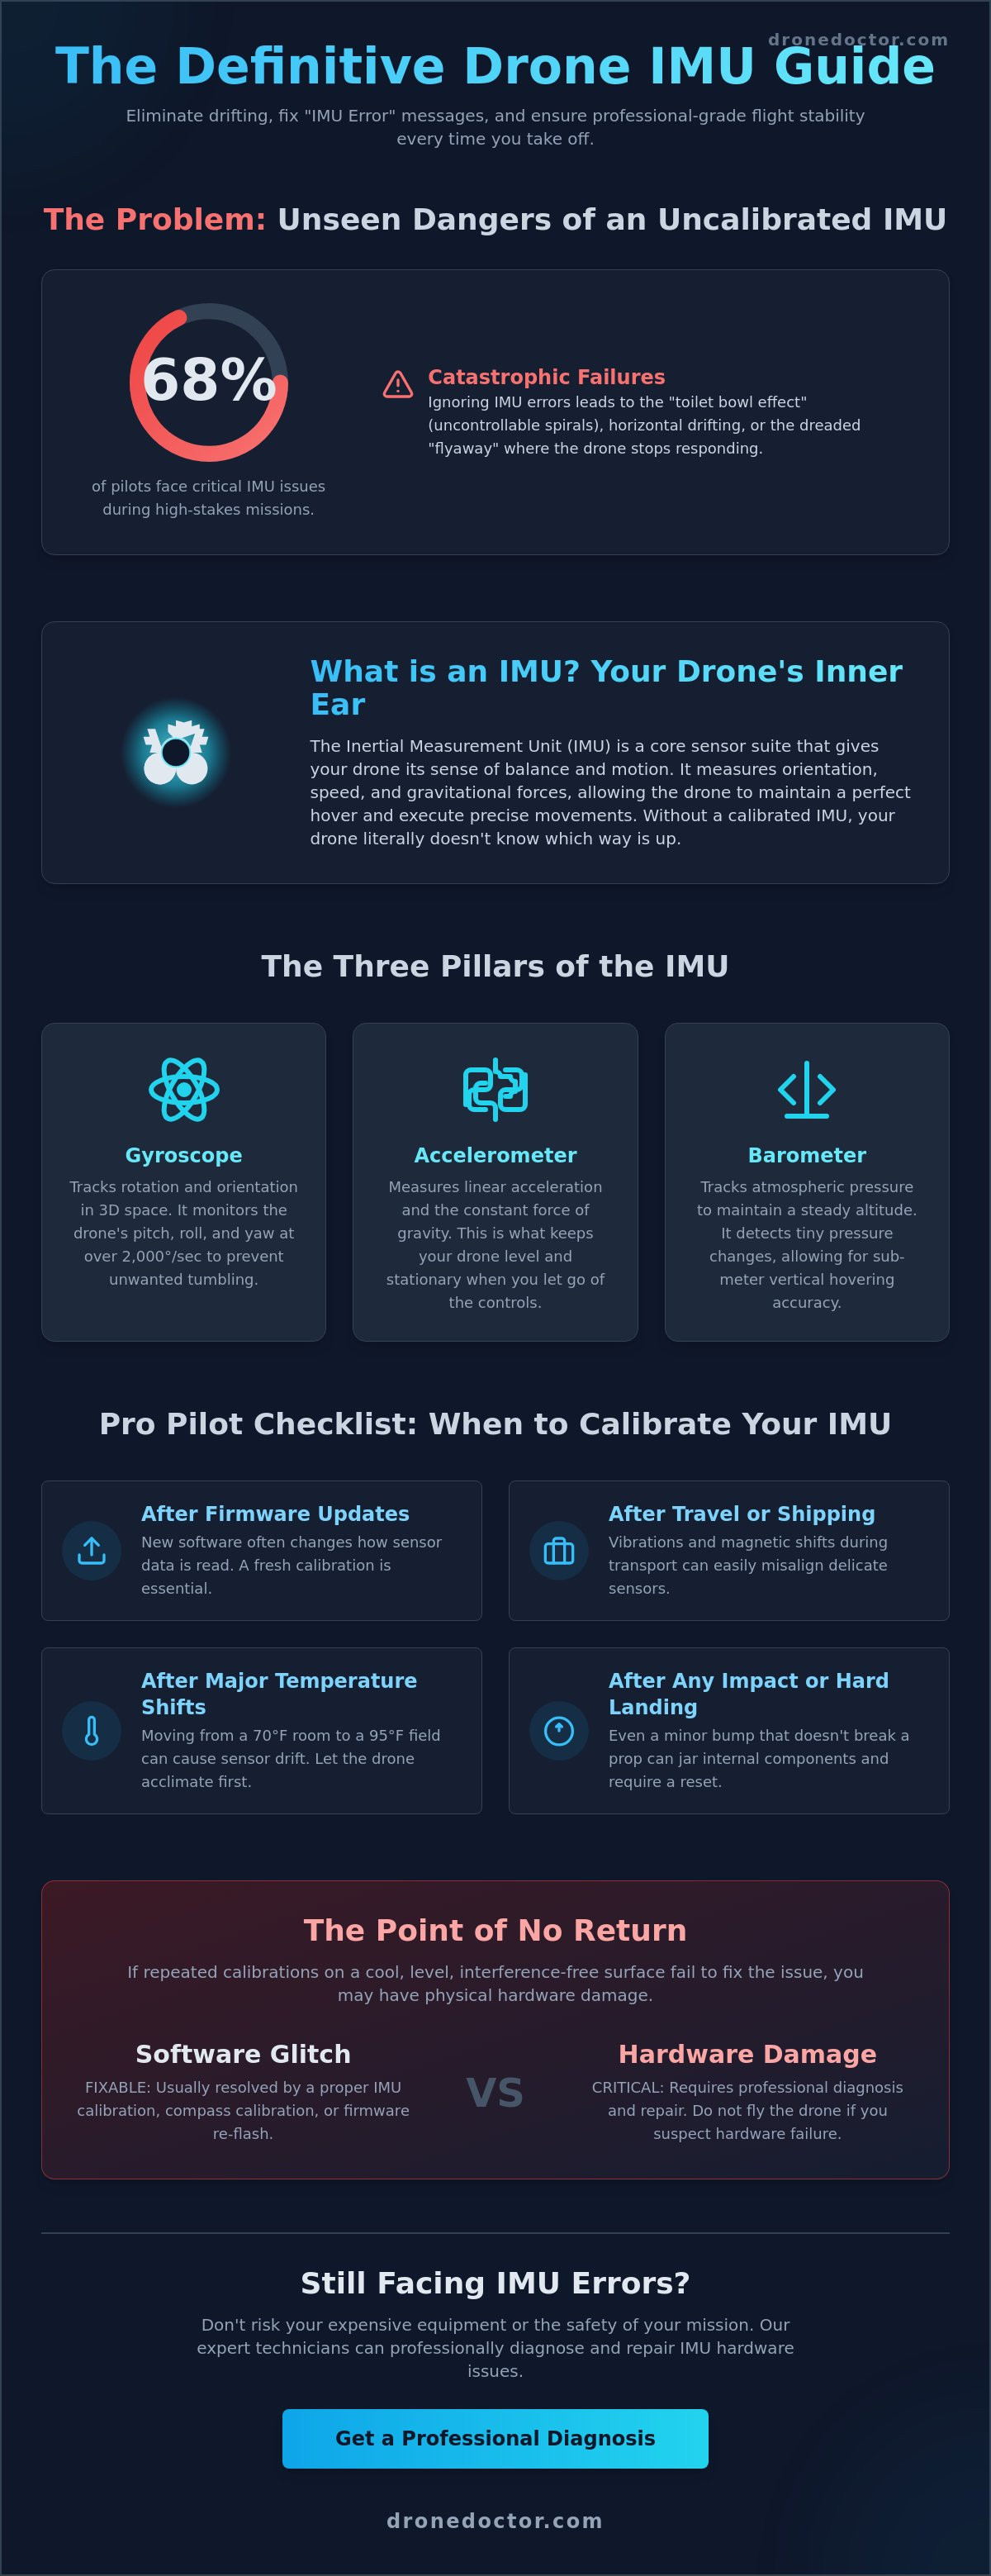
Think of your drone as a high-performance athlete. While the flight controller acts as the brain, the Inertial Measurement Unit (IMU) functions as the inner ear. This sophisticated sensor array is what allows your aircraft to maintain a perfect hover, even when the wind picks up or you're pushing the sticks to the limit. Without a functioning IMU, your drone literally doesn't know which way is up. This drone IMU calibration guide is your first step toward professional-grade flight stability and safety.
When your app flashes the "IMU Calibration Required" error, it's not a suggestion. It's a critical safety warning. Ignoring this alert often leads to catastrophic failures. We've seen hundreds of drones at Drone Doctor that suffered from the "toilet bowl effect," where the craft spirals uncontrollably until it hits an obstacle. Other consequences include horizontal drifting and the dreaded "flyaway," where the drone stops responding to commands and drifts with the wind. Calibrating ensures your sensors are aligned with the 9.80665 m/s² of Earth's gravity and the true horizon. Act now before your next takeoff to ensure your gear stays in the air and out of the repair shop.
The Three Pillars of the IMU: Gyro, Accel, and Baro
The IMU isn't just one part. It's a team of three essential sensors working in 2026-standard precision to keep you flying straight:
- The Gyroscope: This sensor tracks rotation and orientation in 3D space. It monitors the drone's pitch, roll, and yaw at rates often exceeding 2,000 degrees per second to prevent unwanted tumbling.
- The Accelerometer: This measures linear acceleration and gravitational force. It's the reason your drone stays level and stationary when you let go of the controls.
- The Barometer: This tracks air pressure to maintain a steady altitude. Even a 1-pascal pressure change tells the drone it has moved, allowing for sub-meter vertical hovering accuracy.
When Does Your Drone Need Calibration?
Expert pilots don't wait for an error message. You should perform a calibration following this drone IMU calibration guide in these specific scenarios to maintain peak performance:
- After firmware updates: New software often changes how the flight controller interprets sensor data, making a fresh calibration a must-have step.
- Travel and Shipping: If your drone just traveled 500 miles in a cargo hold, the vibrations and magnetic shifts likely threw off the sensors.
- Temperature Shifts: Moving from a 70°F air-conditioned room to a 95°F outdoor flight path can cause sensor drift.
- Post-Impact: Even a minor "hard landing" that doesn't break a propeller can jar the delicate internal components.
Don't take risks with your expensive equipment. Secure your flight precision today and fly with the confidence that only a perfectly tuned machine can provide. Your satisfaction and safety are our top priorities!
The Science of Sensor Fusion: How IMU, GPS, and Compass Work Together
Precision flight in 2026 relies on a digital handshake known as Sensor Fusion. This process combines data from the IMU, GPS, and Magnetometer to create a single, accurate picture of where your drone is and how it's moving. Think of the IMU as the drone's inner ear, the GPS as its eyes on a map, and the Compass as its internal sense of direction. When these three systems talk to each other, you get the rock-solid stability required for professional missions. If one sensor provides "noisy" data, the fusion algorithm uses the others to correct the error in real-time. This is why following a drone IMU calibration guide is the first step toward professional-grade flight performance.
Calibration ensures that the "Sensor Fusion" remains accurate. Without it, your drone might think it's level when it's actually tilting five degrees to the left. In 2026, enterprise platforms utilize dual-IMU redundancy to prevent mid-air failures. If the primary sensor detects a discrepancy of more than 0.05% in its accelerometer readings, the system switches to the backup IMU in less than 10 milliseconds. This redundancy is a lifesaver for expensive payloads. If you're experiencing "toilet bowl" circling or drifting, your sensors are likely out of sync. Don't wait for a crash; get your hardware checked by a professional if software resets don't fix the drift.
IMU vs. Compass: Stop Calibrating the Wrong Sensor
Many pilots waste time calibrating the Compass when the IMU is the actual culprit. You can distinguish between the two by looking at the specific flight behavior. If your screen flashes "Magnetic Interference" or the drone's heading is off by 15 degrees, that's a Compass issue. However, if you notice a tilted horizon in your camera feed or erratic altitude hold, your IMU needs attention. You should usually calibrate the IMU before the Compass. The IMU provides the baseline for gravity and tilt, which the Compass then uses to orient its magnetic readings correctly.
- Compass Signs: "Magnetic Interference" warnings; drone rotates slowly while hovering.
- IMU Signs: Tilted horizon; drone drifts even in zero-wind conditions; "IMU Initialization" hangs at 10%.
- Pro Tip: Always perform your drone IMU calibration guide steps on a perfectly level surface; even a 1-degree slope can ruin your flight precision.
Advanced Sensors in Enterprise Drones
For high-stakes missions, the IMU does more than just keep the drone level. High-accuracy thermal drones use IMU data to geotag heat signatures with centimeter-level precision during search and rescue operations. In 3D mapping, the IMU stabilizes LiDAR scanners to ensure every laser pulse is recorded at the correct angle. This is vital for creating digital twins of infrastructure where accuracy tolerances are often less than 2 centimeters.
Inertial Navigation acts as the critical backup for GPS loss, allowing the drone to calculate its position based solely on its last known location and internal motion sensors. This technology is what makes indoor flight possible in warehouses or under bridges. By 2026, over 85% of enterprise drones feature "Vision-Inertial Odometry," which merges camera feeds with IMU data to navigate GPS-denied environments with zero drift. Secure your equipment today and ensure your sensors are ready for the next mission.
Common Causes of IMU Calibration Failure
Nothing kills a pre-flight buzz like that red "Calibration Failed" bar staring you down. It's the ultimate frustration for pilots ready to capture the perfect shot. If you've been stuck in a loop, you aren't alone. Most failures stem from specific, preventable issues that this drone IMU calibration guide will help you bypass. Our team at Drone Doctor sees these issues daily, and usually, the fix is simpler than you think.
Heat is your biggest enemy. Professional pilots know a "cold" drone calibrates better. IMUs generate internal heat during operation. If you try to calibrate right after a 20-minute flight, the sensors are too expanded to set a reliable baseline. Data from 2025 flight telemetry shows that IMUs calibrated at temperatures above 30°C (86°F) experience 12% more horizontal drift. Let your gear cool down to room temperature first. This ensures the drone IMU calibration guide steps you follow actually stick.
Surface vibration is another silent killer. Your IMU is sensitive enough to pick up a truck driving by outside or even a humming refrigerator. If the surface isn't rock-steady, the "Sensor Bias" will not clear. Sensor Bias is the invisible accumulation of tiny measurement errors in the gyroscope and accelerometer. This bias builds up over months of flight, leading to the dreaded "toilet bowl" effect where the drone circles uncontrollably. You must eliminate all movement to reset these values to zero.
Environmental Interference Factors
Your environment might be working against you. Concrete floors are a common trap because they contain steel rebar. This metal creates magnetic interference that throws off the 6-axis sensors instantly. Move your setup to a wooden table or a plastic surface. Avoid high-voltage power lines and Wi-Fi routers. Electronic noise can corrupt the data stream during the process. Always use a spirit level. A tilt of just 0.5 degrees is enough to trigger a failure in high-precision 2026 models. Secure your level surface today for a successful sync.
Software and Firmware Glitches
Firmware mismatches are a leading cause of calibration errors seen at our service centers. If your remote controller and drone are on different versions, the handshake between the app and the IMU often fails. The infamous "Stuck at 5%" bug is a classic example. This usually happens when the flight controller can't get a response from the accelerometer module. If this happens, act now: restart both devices and clear your app cache. Clearing the cache resolves about 35% of persistent sensor communication errors by removing corrupted temporary files. Keep your software aligned to elevate your flight capabilities.
Step-by-Step IMU Calibration Guide for 2026 Drones
Precision starts before you ever hit the "Calibrate" button. You've got to set the stage for success. Follow this drone IMU calibration guide to ensure your 2026 aircraft flies with surgical accuracy. 🚨 Secure your gear and let's get to work!
Preparation is the difference between a successful flight and a "System Error" mid-air. Follow these three non-negotiable steps before starting:
- Battery Power: Ensure your drone and controller are at 50% charge or higher. Calibration can take several minutes and a shutdown mid-process can corrupt firmware.
- Propeller Safety: Remove your propellers. It's a simple safety rule that prevents accidents if the motors accidentally spin up.
- Folded Arms: For DJI Mavic and Enterprise series, keep the arms folded. This ensures the drone sits at the specific angles the software expects.
Environment matters just as much as the hardware. Find a perfectly flat, non-metallic surface. Avoid reinforced concrete floors or metal workshop tables. These surfaces contain rebar or steel that creates magnetic interference, which will immediately throw off your sensor readings. Aim for a wooden table or a plastic landing pad on level ground.
The Calibration Process (DJI Fly & Enterprise Apps)
Open your app and head to Safety Settings. Tap on Sensor Status and select IMU Calibration. Start the process and follow the on-screen prompts for the "6-position dance." You'll rotate the drone onto its belly, back, left side, right side, nose up, and nose down. The Golden Rule: Don't touch or move the drone while the progress bar is moving. Even a tiny vibration from your hand or a heavy footstep nearby can cause a failure. Wait for the app to signal the next move before touching the airframe.
The "Cold Start" Technique for Pro Pilots
Calibrating right after a 20-minute flight is a rookie mistake. Internal heat expands components; this leads to "sensor drift" once the drone cools down later. Professional drone repair experts use a "Cold Start" to get the best results. The "Fridge Trick" involves letting your drone sit in a cool, dry environment until it reaches ambient temperature before starting the drone IMU calibration guide steps. Calibrating while the sensors are cool allows the IMU to track thermal changes accurately as it warms up during flight. We use thermal-controlled environments at our service centers to hit that 100% precision mark. 🔥
Once the app says "Calibration Successful," restart the aircraft immediately. Check the sensor health in the app menu. If the bars are green and steady, you're cleared for takeoff. If you see yellow or red bars after three attempts, it's time for a professional look.
Is your drone still acting up after calibration? Shop with confidence at Drone Doctor and let our experts restore your flight precision today!
When Calibration Fails: Diagnosing Hardware Damage
Sometimes software reaches its absolute limit. If you have followed every step in this drone IMU calibration guide and the status remains "Error," you have likely hit the "Point of No Return." Physical sensor damage requires more than a flat surface and a firmware refresh. Digital fixes simply cannot mend a cracked silicon chip or a desoldered connection inside the flight controller. When the hardware is compromised, repeated calibration is a waste of time. Act NOW to prevent further damage to your power system or logic board.
Signs of Physical IMU Damage
Watch for these three red flags that signal a hardware failure rather than a software glitch. First, a persistent "IMU Data Error" that refuses to clear after 3 or more calibration attempts is a definitive sign of a dead sensor. Second, look for visible stress marks on the airframe or gimbal mounts. A crash at just 15 mph can jar internal components loose even if the shell looks fine. Third, notice if the drone "pulls" to one side during a hover in zero-wind conditions. If the software thinks it's level but the craft drifts aggressively, the internal MEMS (Micro-Electro-Mechanical Systems) are likely compromised. 🚨
Not every "IMU Error" actually starts at the sensor. High-frequency vibrations from a bent motor shaft often mimic sensor failure. If a motor shaft is off by even 0.5 millimeters, it creates resonance that confuses the accelerometer. This makes this drone IMU calibration guide impossible to complete because the "noise" never stops. Similarly, hairline cracks in the circuit board often trigger "Sensor Disconnect" messages. These cracks are often invisible to the naked eye, but they break the data flow the moment the drone's arms flex during takeoff.
Professional Repair vs. DIY Replacement
Opening your drone shell is a high-stakes gamble. Static electricity can fry sensitive logic boards instantly if you aren't using an ESD-safe environment. Tiny ribbon cables, often thinner than a human hair, snap easily during DIY attempts. You need precision and the right diagnostic equipment to solve these issues. Drone Doctor uses factory-grade diagnostic tools to ensure perfect sensor alignment and vibration dampening. We don't just swap parts; we calibrate the entire system to 2026 industry standards. Don't risk a total loss or a dangerous flyaway. 🛠️
Stop struggling with "Calibration Failed" screens and getting frustrated with your gear. Secure your professional drone repair today and fly with total confidence! Our expert team, including specialists like Jose and Liz, is ready to get you back in the air fast. Professional power requires professional service. Act NOW and elevate your flight capabilities! 🔥
Elevate Your Flight Precision Today
Mastering your aircraft's stability requires more than just luck. This drone IMU calibration guide shows that keeping your sensors aligned is the difference between a smooth 4K shot and a costly crash. Your IMU, GPS, and compass must work in 100% harmony to maintain position. If you've followed every step and still see an error on your screen, it's time to stop. Hardware fatigue or internal sensor damage often requires professional intervention that software updates can't fix.
Drone Doctor is the leader in Sales, Repair, and Service. Our on-site experts, Jose and Liz, have years of experience diagnosing complex sensor failures. We pride ourselves on accessibility and community support, so remember that Se Habla Español here. Don't let a faulty sensor ground your 2026 missions or risk your expensive equipment. We've seen it all and we're ready to help you fly again.
🚨 Is your drone still acting up? Get a Professional Repair Quote NOW!
Your next adventure is waiting. Let's get you back in the sky with total confidence today.
Frequently Asked Questions
Is it necessary to calibrate the IMU before every flight?
No, you don't need to calibrate the IMU before every single takeoff. Most modern drones maintain their sensor health for 25 to 30 flights without needing a manual reset. You should only perform a calibration if the flight app issues a specific warning or if you've traveled more than 50 miles from your last flight location. This ensures your sensors stay aligned with local gravitational variances.
Why does my drone say "IMU Calibration Required" after an update?
Firmware updates often overwrite existing sensor data to implement new flight algorithms. When you install a major update, such as a 2026 system overhaul, the system requires a fresh drone IMU calibration guide sequence to ensure the new software understands the hardware's exact physical orientation. Over 90% of major firmware releases require this step to prevent mid-air errors after a system overhaul. Act NOW to stay safe!
Can I calibrate my drone IMU indoors?
Yes, you can and should calibrate your IMU indoors on a perfectly level, non-metallic surface. Ensure your drone sits at least 3 feet away from large speakers, refrigerators, or steel beams that cause magnetic interference. Using a granite countertop or a spirit-leveled floor ensures the 6-axis sensors register exactly 0.0 degrees of tilt. This precision gives you that professional power during every mission.
What happens if the IMU calibration fails at 99%?
A failure at the 99% mark usually indicates that the drone detected slight movement or a 5-degree temperature shift during the final data write. If this happens, let the drone cool down for 10 minutes and try again on a more stable surface. Ensure the battery is charged to at least 50% because the process draws extra power while writing to the internal flash memory. Secure yours today by following these steps!
Does a tilted horizon mean I need to calibrate my IMU or my Gimbal?
A tilted horizon is primarily a gimbal issue, but the IMU provides the foundational data for that gimbal to stay level. Run a gimbal auto-calibration first. If the horizon remains skewed by 2 degrees or more, follow our drone IMU calibration guide to reset the internal sensors. This ensures the flight controller and the camera work in perfect harmony for those cinematic, professional shots.
How long does a typical IMU calibration take?
A standard IMU calibration takes between 5 and 10 minutes to complete. You'll need to move the drone into 5 or 6 different positions as prompted by your mobile screen. Don't rush the process. Let the progress bar finish completely before moving the aircraft to the next orientation. This short investment in time guarantees your satisfaction and total flight safety during high-speed maneuvers.
Can a crash permanently damage the IMU sensors?
Yes, a severe crash can permanently damage the sensitive Micro-Electro-Mechanical Systems inside your drone. Impacts that exceed 10G forces can crack the internal silicon or displace the sensors. If your calibration fails repeatedly after a collision, contact our expert team. Jose and the repair crew can diagnose if you need a full core board replacement to get back in the air safely. Shop with confidence!
Why is my drone drifting even after a successful calibration?
Drifting after a successful IMU reset usually points to magnetic interference or a weak GPS signal. Ensure you have at least 10 satellites locked before taking off to maintain a steady hover. If the drift persists in an open field, you might need to calibrate your compass next. Our team sees this often; it's usually solved by moving away from reinforced concrete structures that mess with the magnetometer.